Showing posts with label plates. Show all posts

Monday, 26 September 2011

showcard prints


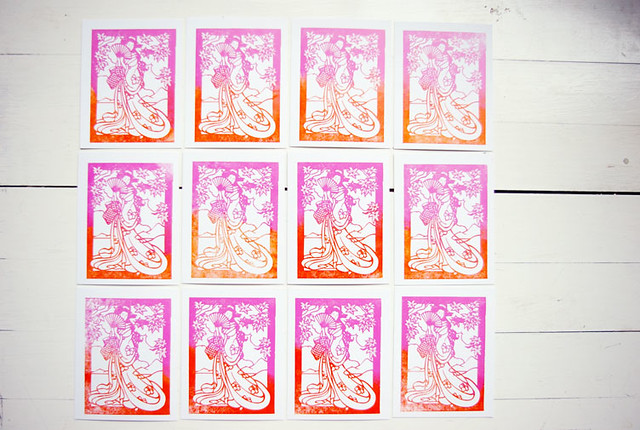
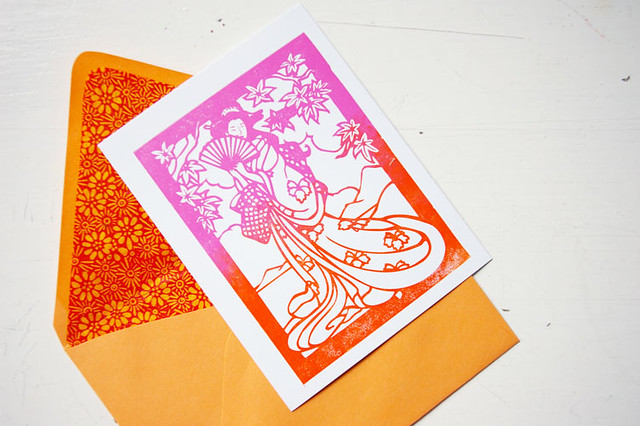
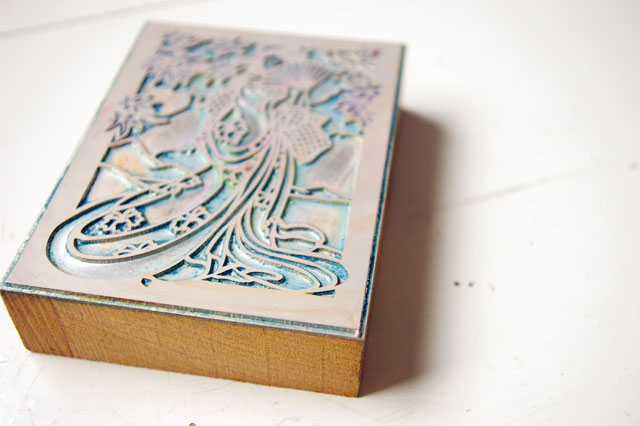
One of the very first dies I ordered (fours years ago) was from Owosso Grpahics. I made the mistake of thinking that I'd actually get some kind of impression on my cardstock with this image in my Adana. Though I did get the image to transfer to the cardstock, the surface area was just to large for the 8x5" press to give any kind of bite.

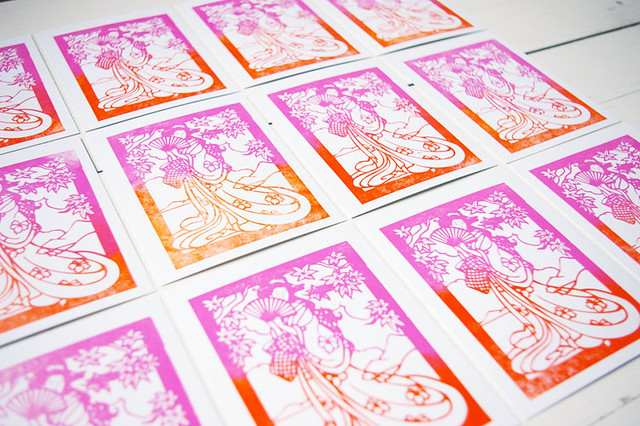
But, the other night I realized that the size of this die was perfect for experimenting with on the Showcard. It was wide enough for my brayer to comfortably roll over with two colours. Still not a leap in the impression department but I wasn't aiming for that. This is just another reason why I love the Showcard, it lets me play with multiple colours at a time.

I call these prints Pink Sunrise, Orange Sunset.

//

Friday, 8 October 2010

workshop update: the 'Tabletop Letterpress Workshop'


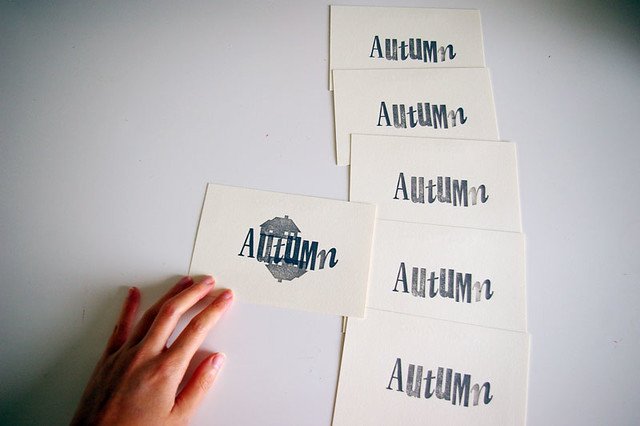
I picked up this gorgeous Post Card cut from Don Black's Linecasting's last week. This of course had me printing some impromptu postcards (anyone else have a thing for postcards or is it just me?) as soon as I got home with it. With fall here and Thanksgiving weekend upon us Canadians, I'm inspired by the colours of the changing leaves and the beautifully erratic weather we've been having. Autumn is my favorite.

I've got a small update to the s + t workshops. As a response to many participant requests, I have now combined the Postcards + Notecards workshop with the Letterpress Curiosity Workshops. This means that participants will now be able to print with the studio's 50+ cuts/images/icons along with typesetting with wood and lead type for their stationery. Welcome the new Tabletop Letterpress Workshop.

Have a lovely weekend, everyone.

Friday, 21 May 2010

my platen set up

I've been asked if whether or not I mind sharing my printing tips. Of course not, but I can see the reasoning behind the question. Wouldn't I want to keep some trade secrets? It is after all becoming a larger industry with competitors just around the corner. I think letterpress printing is a brain trade, tips and techniques passed down and onto others. What better way to keep it alive than to share it? Sure there are downfalls to passing along information because not everyone is genuine or as passionate as others. But that fact alone isn't a good enough reason to withhold what you know. So to that end, I say - share. Help out the ones starting out or have dreams to. Even long time practitioners will find another printer's way of doing things helpful. And if someone takes your knowledge and capitalizes it or runs with it as their own ideas or practices (and they will) don't sweat it. It's what you bring to the table-top that matters.

That said...here are a few tips that I use and share in the Letterpress Curiosity Workshop. They are my way of doing things and I hope it's useful to you readers.

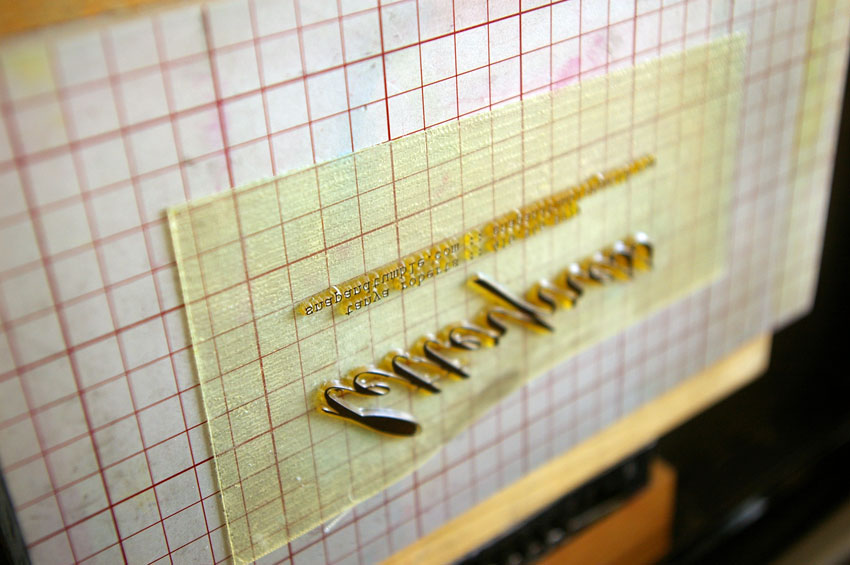
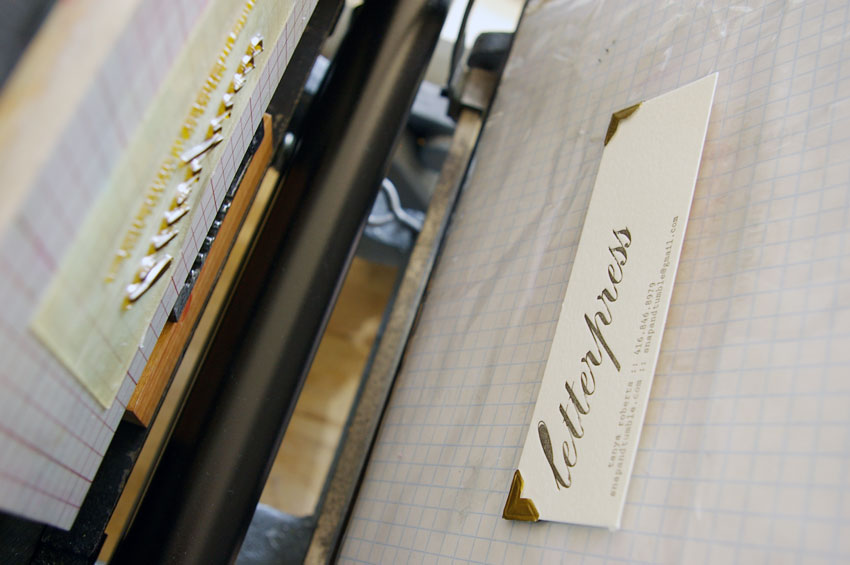
Above are photos of the Boxcar base in action with Boxcar photopolymer plates and my platen set up. I'm not in the habit of changing my tympan paper. The typman grippers take a mighty might to move and it's just a downright hassle. It's another reason why I don't use gauge pins. When I did use gauge pins, I had to switch the typman paper to new ones quite often.

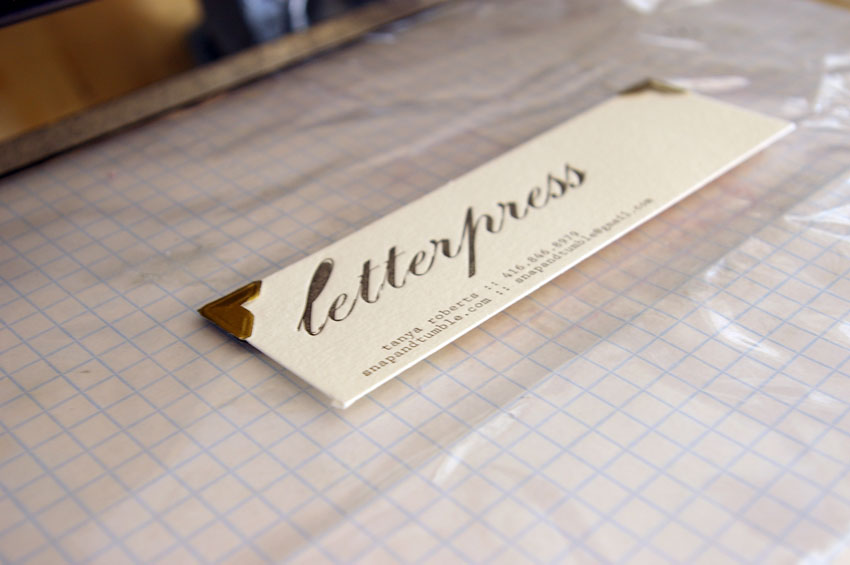
Instead, I've got just enough typman for every run and make adjustments with packing per project. On the platen I've placed a sheet of grid paper that helps me line and square up my cardstock. This is super helpful when it comes to blind printing and when I'm not using crop marks.

On top of the grid paper, I've placed a plastic sheet. This comes in handy when a print is accidentally made without cardstock on the platen. Alot of my workshop participants have done this and their eyes go wide with fear. You can use baby powder to help take away some of the ink on the platen/tympan paper but it's much easier to wipe it off the plastic completely and it's like it never happened.

I've also mentioned the use of photo corners before. I use these because gauge pins would get in the way of the base and do damage. The photo corners aren't without a disadvantage though. They prevent printing a small area on the two corners of the cardstock. But for the most part, it hasn't hindered any designs I've made. Sometimes you just have to design around the tools you're working with.

If you've got any (usual or unusual) printing tips and techniques that have worked for you and you're willing to share, I'd love to hear about it.

UPDATE HERE.

+

Wednesday, 27 January 2010

pattern + print

I'm just a little bit crazy over one of my thrift store finds. This is from an old embroidery pattern book that I bought a couple of months ago. Gorgeous letters, ornate but simple. And yes, you guessed it. They'll be turned into plates and printed.

Friday, 8 January 2010

letter love fridays + working on workshops

Over the holidays I took some time to brainstorm on what's next for snap & tumble. The letterpress workshops of 2009 received great response so I've take a closer look at these. I've had a few requests to offer more workshops focusing on printing with plates and images. Currently, participants are using only type to print with. I think the best way for participants to get the full experience, is to typeset. There are a lot of possibilities using type and experimenting with it challenges you. Using images after learning to use the fonts, is a breeze.

Back to what I was saying, thoughts on focused workshops.

letterpress printing session for the newly engaged:
One of my past participants is in PR and she mentioned the idea of holding workshops for brides. She even described what she thought about a workshop for the bridesmaids. This could be interesting, especially now that the DIY bride is making a strong comeback. And though the idea of a letterpress printing shower for the bride is exciting, it may not be a practical one since the maximum amount of participants for a workshop is 3. I've been asked if whether or not I'd "rent" my press out to brides who are interested in printing their own stationery. My response to this is, why just the bride? There are quite a few grooms, dare I say, who take the lead on the wedding stationery. I'd happily consult on designs and work with a couple who'd want to print their own suite. So perhaps, not a workshop for brides. But a letterpress printing session for a couple (bride+groom/bride+bride/groom+groom) who are looking for a different kind of shared, unique experience to start of their wedding planning.

I'm also playing with workshops solely for business cards, baby announcements, thank-you's and personalized notecards. All exciting stuff, folks. And this is just workshops - I may have a project or two up my sleeve ;)

thoughts and feedback are welcome!

Monday, 18 May 2009

full steam ahead

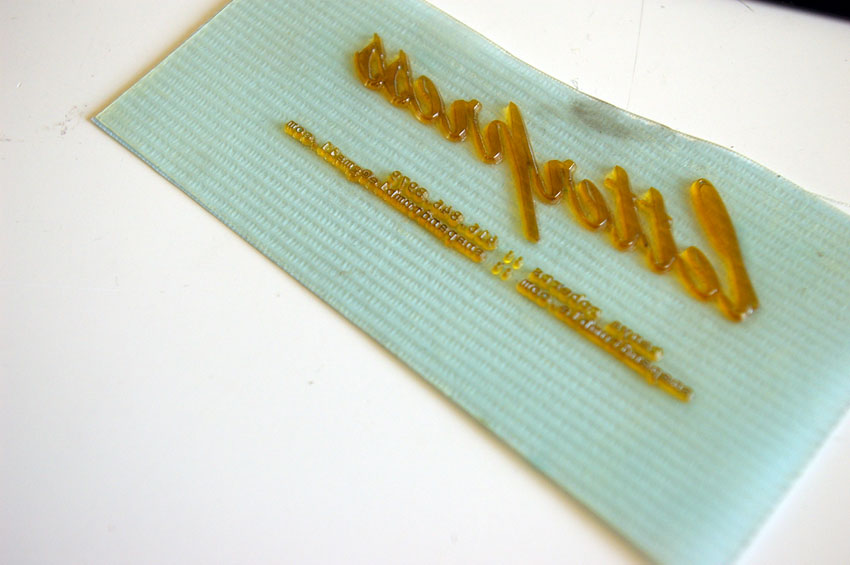
Okay, so no rest for the wicked. Now that the Handmade Market is over, I'm able to focus on a couple of wedding invitations I've been commissioned to do. It's a long weekend for Canadians and as much as I'd love to relax today, I'm going to take advantage of my time off to print. Above is a photo of a polymer plate that I'll be using to print maps. See the high ridges? Ooh, the impressions are going to be stellar!

Sunday, 5 April 2009

golden times

gold ink branches letterpress

I rarely print with my metallic inks and it's such a treat when I do. The branch plate is one of my favorites. It feels stark, especially printed on it's own. The line detail is great in terms of letterpress because the impressions are so clean and deep. I'm an autumn girl, so these branches bring memories of crisp morning air, fallen leaves and Thanksgiving dinner with the family. While I'm certainly ready for spring, I always look forward to September weather.


Monday, 19 January 2009

shelley suite part II

I finally got my plates from Boxcar during the week which meant it was a busy weekend for me. So good to get back onto the press! A few weeks ago, I had printed up the envelopes for Shelley's wedding invitations. This past weekend, I got to print up her invitations! All went well with the Boxcar system (although, it still took me a while to centre and straighten everything up).

The idea for her invitation suite is to blind deboss the main titles, such as her and her fiance's names. This meant, passing the invitations twice through the press. Once for the blind embossing of the names, and second for the remainder of the text in a Pantone grey. Because you can cut the photopolymer plates, registration was a cinch! This was my first attempt at the system and I am hooked. There would have been no easier way to do this and I would not even try to imagine doing this with magnesium plates.

My base was pushed all the way to the top of the chase which would've hit the paper gripper and so I used a trusty rubber band to keep my paper in place and from making contact with the ink disc. I love how simple tools can make your life a whole lot easier!

Speaking of which, the card stock was situated so that I couldn't use my regular gauge pins without having them smash the base upon pressing. I picked up some sticky photo corners and they work like a charm!


Stay tuned next week for the printing of the maps!

Monday, 3 November 2008

holiday printing continues

I'm doing everything I can to not set up my Christmas tree. It's only November and it's supposed to be 20 degrees in Toronto tomorrow. I'm promising to put up our tree upon first snowfall or for December 1st. In the meantime, any vintage ornaments I come across, I'm snapping up.

I tried out the second set of photopolymer plates over the weekend and love the results of the reindeers.

Saturday, 18 October 2008

lukewarm

Today was the first time I had tried out the photopolymer plates. I haven't fallen in love with them but I'm really in like with them.

I had been using D-Limonene (Tri-Art) cleaner and regular vegetable oil for my clean up process. But since I was trying the Boxcar base and the photopolymer plates today, it was suggested by many that I use California Wash so as not to damage them. Considering that the items were a bit on the pricey side, I didn't want to take the chance at screwing anything up. So first thing I had to do was transfer some of the California Wash (I got delivered on Friday) into a small bottle. I couldn't very well use the wash straight out of the gallon can. To my horror, the wash smelled toxic! I suppose I should've expected that. But being used to harmless Canola oil and the orange scent of the D-Limonene, I was petrified of the new cleaner. If I'm going to use this stuff, I think I'll have to dilute it with 50% water.

I should've called it day right then.

But instead, I cut up my plate and placed it on the base. So far so good. I did a test print and liked the results, except for the residual ink that was being caught on the top of my plate.

I had anticipated limited placements of my gauge pins and had some make-shift place-holders on hand. They are like those sticky photo-corners you find in scrapbooks. So, no smashing the base over here.

I had some text on my plate and found a bit of trouble getting my cardstock to line up so that the "new year's cheer" was straight. Seemed that no matter how many times I moved my pins up or down, I just wasn't getting the copy straight. Very frustrating. And so, I split the text and image up into two. This part was actually liberating because you can't do that with magnesium plates.

In doing that, I decided that the card needed the same image printed again but in a different colour and position. Instead of having to move and lock up the forme, I just had to lift the plate and re-adjust on the base. Easy.

Another thing I like about the plate/base system is that I found very little bruising on the other side of the cardstock. I suppose that's because the photopolymer is much softer than the magnesium and gives some way under pressure. Yet, it still gives a nice impression on the paper!

I've got two more holiday plates to press with and looking forward to the results.

Wednesday, 17 September 2008

i heart the Boxcar base

Boxcar base arrived today. If it hadn't been for the $60 duty charge I would've shaken the delivery guy's hand.

Thought I'd share a few photos of what the Boxcar base looks like. That and to settle my fears (as well as anyone elses who's thinking of getting the base, so I hope this post helps). I've been using magnesium plates backed by wood and haven't had any issues but wanted to see what this base was all about. I waited about a year to shell out for the base and now it's here.

The recommended base size for my eight-five is 3.5x6.5". I wanted to maximize my print area and got them to cut the base to 4x7" instead. I still need to leave room for quoins, furniture and room for the gauge pins. Oh, and look at the pretty grid.

Here is the base beside one of my larger magnesium plates. I'm pretty glad I didn't go smaller than 4x7".

The base beside the wood-backed magnesium plate also got me grinning. The base is looking like it's just the right height. Yes, the good folks at Boxcar know what they're doing, but I hadn't seen a base before and I couldn't find any resources out there to put my worries to rest.

Here, you can see that the magnesium plate is just above the base which means (I hope) that a photopolymer plate (once adhered to the Boxcar base) will make up for the rest of the height.


The base locked up and ready for my final test.

I had read on Briarpress some post about the Boxcar base being too high once set in the chase. People then would have to adjust their roller height or tape the rails. I've also read that taping the bottom of the base was necessary so that ink from the rollers wouldn't stain it. The last thing I want to do is manipulate anything on my press as it's already set up to print perfectly with my good ol' magnesium plates.

Phew. A close up of my rollers NOT touching the Boxcar base while it's in the chase. I'm thanking my lucky stars that my Boxcar base experience so far is a good one. Now, time to get me some photopolymer plates.

Thursday, 4 September 2008

back to boxcar

Last year I mulled over the idea of getting the infamous Boxcar Base. I had (and am still) been using magnesium plates with wood backings. I haven't had any problems with printing from these plates whatsoever. So, why am I considering switching things up a little? Because - I'm a sucker for punishment and I live for dilemmas. If I get the Boxcar base, I'm sacrificing some space within my 5x8 chase. The recommended base size for my chase is 3.5 x 6.5. Tiny. But, they recommend with good reason - mainly so that my furniture, quoins and gauge pins will fit without screwing up the base, paper or print job. To add to the debacle, I may experience roller height issues. The last thing I want to do is fiddle with the press because I've got it just so that it prints perfectly with the mag plates. Argh.

What I'm intrigued about are the photopolymer plates themselves and the handy grid lines on the base. If anything can make registration easier, then I'm on it. That, and it seems as though everyone's got one of these already.

I posted on Briarpress to what other five-eighters are using and the one response I got was all I needed. He recommended that I go with the recommended. I'm not an expert, and so, if someone else who does this for a living was kind enough to take the time to respond to my question - I'm going to go with his advice especially since he's got experience with the 3.5x6.5 base.

I'm taking the plunge - Boxcar Base, here I come.

PS. If you're in the same predicament with the Boxcar base, or have any success/horror stories (specific to the size base I'm considering), I'd love to hear them.

Saturday, 2 August 2008

pillars, place cards and postcards, oh my!

Because we weren't sure of the weather today, fiance and I stuck around the city instead of going to the cottage for the long weekend. What's a girl to do then? Print her place cards, that's what.

A few years back I purchased Cavallini & Co. postcards from a small paper shop in Yorkville. I held onto them because the botanical drawings were just so sweet to look at. I didn't have any intention of sending them out or sharing them. Until now.

I went back to The Paperie and picked up the Birds and Animals assorted packet as I'd need about 54 place cards. Chris' aunt does calligraphy and so I sought her help and she was more than happy to lend a helping hand (bad pun).

In the garden that Chris and I will marry, there is a four post pillar that we want to have the ceremony in front of. We took a picture of the pillars, put it into Illustrator and made a vector image. The good people at Owosso made the mag plate and voila...vintage postcard place cards for a paper themed wedding. I hope our guests will love them as much as I do and will take them home as a keepsake of our wedding.

Wednesday, 4 June 2008

and they said it couldn't be done

It's been a busy few weeks with wedding planning. Oh, didn't I mention it? The fiancee and I decided because it's going to be a small affair, that we could pull it off the planning in three months. We've gotten the majority of the things out of the way, so we're almost there. The wedding is going to be in late August and so the invitations had to be designed and sent! The past weekend was a doozy!

Let's just be clear - I have never printed wedding invitations before. And I was quite happy to try my hand at it for the first time on my own invitations. If I screwed up it'd be awful, but at least no one would be upset with me except for me. So at least that type of pressure was off. Still, I found that I was more anal than ever - measuring paper twenty times and cutting once. Oh and the ink mixing took me two hours. Who does that?

I had a limited supply of paper to print on and so mistakes had to be at a serious minimum. I made sure that I had a couple of plain bond paper make-ready's because I knew registration was going to be a bi$#*&! I had three separate plates to print on the invitation, two of which were in different colours. I would highly recommend to NOT do this to cut down on the stress.

A morning, an skipped breakfast and lunch and an evening later, I had my wedding invitations. My fiancee and I were pretty impressed with the results. So for anyone who thinks you can't print quality wedding invitations on a table top or an Adana...well...have a look:

Saturday, 20 October 2007

lowlight

I made my second attempt at ordering plates from Owosso on Wednesday in the hopes of receiving them on Friday so that I'd be able to print this weekend. Thinking that UPS would leave it at my doorstep like last time, I didn't think there'd be an issue. Wrong.

Apparently there was a COD (Cash on Delivery) charge and I wasn't home to pay it. So UPS took the package back with them to UPS land. I called into customer service and payed by credit card and will end up with the package on Monday. Boo.

UPS explained that the first delivery from Owosso was a 'gift' and it was also under a certain amount of dollars. This time the shipping alone was about $10, not complimentary AND for the package to cross the border it was another $25. This puts a crimp in what was my 'future plan' for more plates.

sigh.

Saturday, 6 October 2007

gorgeous in green

It was great to get on the press this morning. I tested out my new Geisha plate and couldn''t be happier with the results.

This is about the fourth time I've gotten to work the press up and I'm getting better in terms of organization and clean up. Practice and the workshops both helped in setting up my tiny printery. For one, I've put vegetable oil in a plastic mustard/ketchup bottle for easy dispensing when it comes to clean up time. Two, I'm using old t-shirts now to clean off the plate and rollers. Not sure what I was thinking using paper towels the first time around. And third, I got the idea from Akemi in the Kozo workshop to use a laminate or plastic sheet over my tympan paper. It's much easier wiping ink off plastic than tympan.

I've got to get better at registration. It's a bit challenging on the Adana because the platen is attached to the press and I'm not able to take it off (as far as I know). So I'm getting ink on my hands sometimes when I'm assembling the gauge pins. And that's another thing - I've got to find something better to use other than gauge pins. They sometimes scratch the paper or leave indentations. Really annoying that is when you've got a perfect print.

Other than that - the magnesium plate is all good. I was a bit concerned at first because they are a little bit over type high. But it didn't seem to effect the outcome. So this means more orders from Owosso.

geisha greeting cards

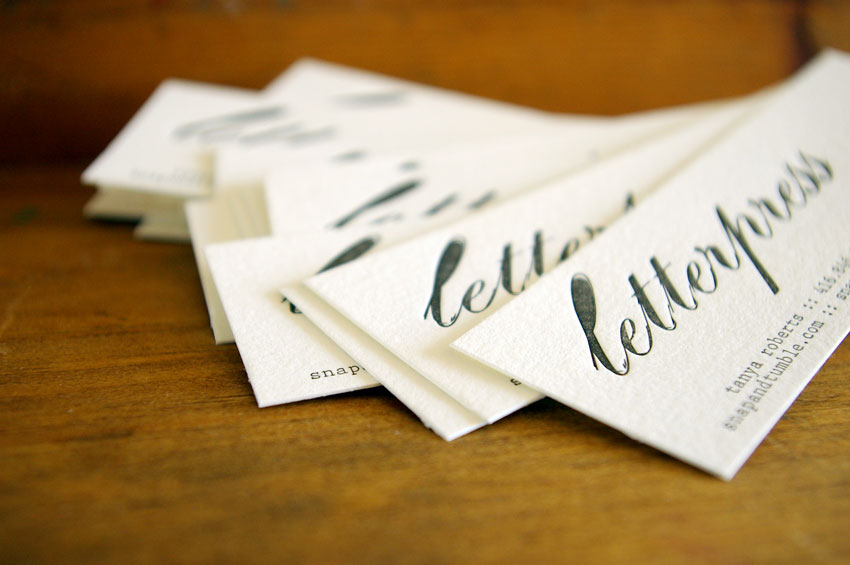
printing on a blank business card

Thursday, 4 October 2007

greetings geisha

What a lovely surprise I found at my doorstep this evening. It's almost as good as a handwritten letter! It's official, I am impressed with Owosso Graphics. Kind of bittersweet that the order process and delivery went so smoothly because I can see myself doing this quite frequently. Stay tuned for some prints.

Tuesday, 2 October 2007

magnesium plate

sneak peek of the image I chose for my first mag plate

I feel much better now having sent in my first order with Owosso Graphics. I think it's brilliant that they offer a free die to first time customers. I finally chose an image that can be used for any occasion and created the file in Illustrator. I followed the online order form instructions and found it to be pretty painless. Just to be sure, I also faxed in my order with a proof of copy of the image. And then to be completely anal about this - I called them and asked if I sent the order properly. I spoke with a Jackie and she was helpful in confirming my order and said that I did everything right. I can expect the plate to arrive in a week. Because my image/plate will be less than 30 square inches, I'll only have to pay for the UPS ground shipping. Sweet deal. Fingers crossed everyone!


Monday, 1 October 2007

on plates

Undecided=Procrastination=No work

I've been doing some research on photopolymer and magnesium plates over the last little while. Because the cost of fonts is atrocious, I've had to resort to a cheaper method for printing images and text. There are pros and cons to using pre-made plates and I'm just biding some time in case I change my mind all together. Or so I tell myself that. It seems that the majority of letterpressers who use plates go to

Boxcar or to Owosso.

I've been in contact with a super nice rep at Boxcar whom I've exasperated with questions. There is quite a cost to purchasing a base first that the photopolymer plates mounts onto and so I have to be certain that this is the route I want to go. On the other hand the magnesium plate is fixed onto a wood base that's typehigh and so the cost is less. However the photopolymers are thin and you can jigsaw pieces any way you want having the freedom to design.

I'm in the midst of collecting images and putting some thought into what I want my first plate to include. Here's my issue: because I haven't seen this done first hand I'm afraid that I might be doing this wrong. And with a cost attached to this, I'd be pleased if I did it right the first time. I'll never know if I don't do it, I suppose. So bite the bullet.

Make a mistake - learn. Don't make a mistake - pat on the back.